Mastering Realistic Floral Portrait Coloring: Techniques for Stunning Line-Art Creations
Why Floral Portraits Captivate Colorists
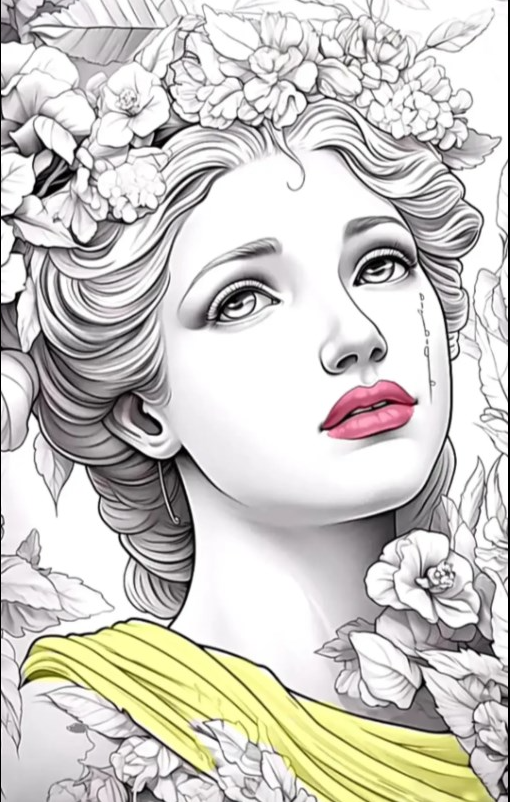
Floral crowns draped across graceful hairstyles, gentle tears glistening on cheeks, and softly shaded features combine to make floral portrait coloring pages irresistibly enchanting. These intricate line-art illustrations offer the perfect balance of natural elements and human expression—inviting you to blend botanical vibrancy with lifelike skin tones. Whether you’re a seasoned colorist or just discovering adult coloring books, learning to bring these portraits to vivid life will sharpen your skills and deliver a deeply satisfying creative experience.
Choosing the Perfect Palette: Harmonizing Skin, Flowers, and Fabrics
Before diving in, thoughtfully select your color scheme to ensure cohesion:
- Skin Tones: Build realistic complexions by layering warm base tones (peach, light tan) with cooler mid-tones and strategic highlights of ivory or pale pink.
- Floral Accents: Contrast soft petals—roses, peonies, wildflowers—with complementary foliage greens. For a fresh look, pair pastel blooms (pale pink, lavender) with vibrant leaf greens; for drama, use deep burgundy or navy accents.
- Fabric and Accessories: The yellow sash in our example can be a focal point. Choose a hue that echoes a flower’s center or a leaf’s vein to tie the portrait together. Metallic pencils (gold, bronze) add luxury to crowns or jewelry.
Mapping out your palette ensures each element enhances the next, creating a harmonious final image.
Foundational Techniques: Building Depth in Line-Art Portraits
Achieving lifelike dimension on a flat page hinges on mastering these basics:
- Layered Shading: Start with a light base color, then gently add darker layers where shadows fall—under the chin, beneath curls, and between petals. Use small, circular strokes to blend.
- Feathering and Burnishing: Feather pencil strokes outward from shadow areas, then use a colorless blender to burnish pigments, smoothing transitions and imparting a polished sheen.
- Edge Control: Reinforce contours—around the eyes, lips, and petal edges—with slightly darker lines or a fine-tip marker. This crispness makes your portrait pop.
- Highlight Placement: Leave tiny areas of the white paper or apply a white gel pen for catches of light on the tear drop, the glint in an eye, or dew on a flower petal.
Combining these methods breathes subtle realism into your coloring, turning simple outlines into three-dimensional wonders.
Advanced Color Mixing: Creating Custom Shades
Generic pencils can only take you so far. Elevate your work by mixing your own hues:
- Skin Customization: Blend small amounts of pink, peach, and ochre pencils to match unique undertones—cool for porcelain skin, warm for olive or sun-kissed complexions.
- Petal Nuance: For depth in flowers, layer a mid-tone (rosy pink) over a lighter base, then add a contrasting color (soft mauve or coral) at petal bases. Use a white pencil to feather tips.
- Leaf Liveliness: Mix emerald, olive, and a touch of yellow to mimic sunlight filtering through foliage. Adding bit of brown or gray at veins enhances realism.
- Fabric Drapery: To mimic folds in fabric like the yellow sash, apply mid-yellow in flat areas, deepen shadows with amber, and gently blend back to highlights using a pale cream pencil.
Experimenting with color ratios helps you achieve nuanced results beyond store-bought shades.
Texture Techniques: From Soft Skin to Glossy Petals
Varying pencil pressure and stroke direction yields convincing textures:
- Silken Skin: Use ultra-light pressure and long, even strokes. Burnish minimally to retain a matte, velvety finish.
- Glossy Lips: Intensify pressure for rich pigment, then apply a dab of white gel pen at the lip’s center to simulate a wet sheen.
- Petal Veining: Draw fine lines radiating from flower centers with a sharp colored pencil or fine-tip pen, then gently blend edges for organic vein patterns.
- Leaf Ridges: Mimic real leaves by layering a darker green along one edge, then sweeping a lighter green across—this contrast suggests a raised ridge catching light.
Mastering varied textures makes each element—from skin to flower—read as distinct and touchable.
Bringing Tears to Life: Conveying Emotion Through Detail
A single tear drop can transform a portrait into a poignant moment. Highlight it effectively by:
- Shape and Placement: Position the tear on the lower eyelid’s curve. Keep its outline soft, avoiding harsh lines.
- Highlight First: With a white pencil or gel pen, draw the teardrop’s brightest spot. This single highlight anchors your viewer’s gaze.
- Surrounding Shadows: Lightly shade beneath the tear with soft gray or cool brown to suggest its weight on the cheek. Feather edges for a natural flush.
- Reflective Nuance: Inside the drop, add a secondary highlight—a faint arc of white—to capture how fabric and flora reflect in its surface.
By layering highlights and delicate shadows, that solitary tear will glisten with evocative realism.

Conclusion: Cultivate Your Signature Coloring Style
Coloring a floral portrait with the finesse of a seasoned artist requires patience, deliberate technique, and a willingness to experiment with hues and textures. By harmonizing your palette, mastering layered shading, crafting custom mixes, and attending to emotional details like a shimmering tear, you’ll elevate line-art coloring from a simple pastime into a gallery-worthy art form. Remember, each portrait you complete refines your skillset—so gather your pencils, embrace the blossom-filled crown, and bring these enchanting faces to vibrant life. Your masterpiece awaits on the page.